Decking fixings are a product in M&E that isn’t widely discussed.
Therefore, you might not be aware of some mistakes that you may be making when installing bracketry to the underside of decking, or how to select the correct fixing for your application., or maybe you’d just like to find out more about this topic. If any of the above apply to you, keep reading, or click through the below subheadings:
- What are decking fixings and their purpose?
- What are the different types of decking fixings to choose from?
- How do I know which decking fixing I need?
- Don't forget the manufacturer's recommended torque settings
- Ensure the entrance of the wedge is within tolerance
- Don’t drill into the concrete!
- Conclusion
What are decking fixings and their purpose?
Decking fixings are fixings with guaranteed safe load capabilities for suspending building services from the underside of composite deck floors, pre-cast hollow concrete ceiling slabs and steel sheeting.
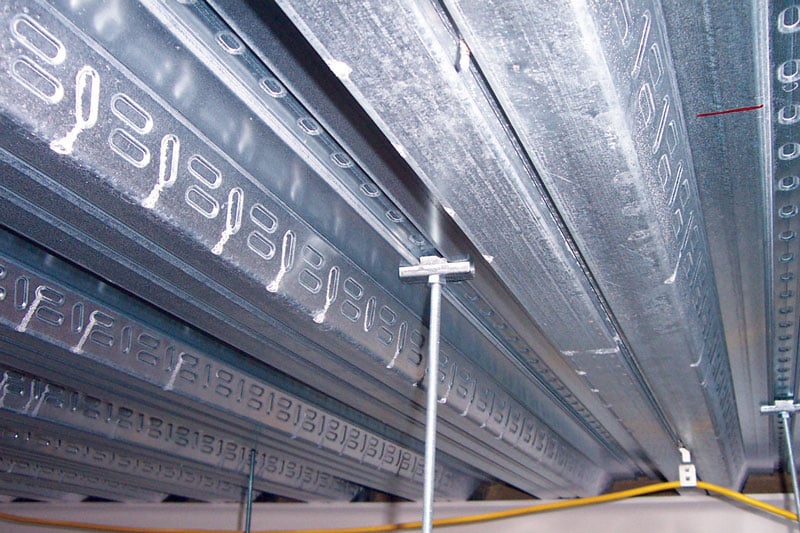
They are designed to fit into the re-entrant channels in the decking and can simplify the installation of services, without the need to drill directly into the ceiling. Some products fit one particular decking type while others are universal.
What are the different types of decking fixings to choose from?
There are a few different types of decking fixings that you should know of, so let’s break them down.
Wedge nuts:
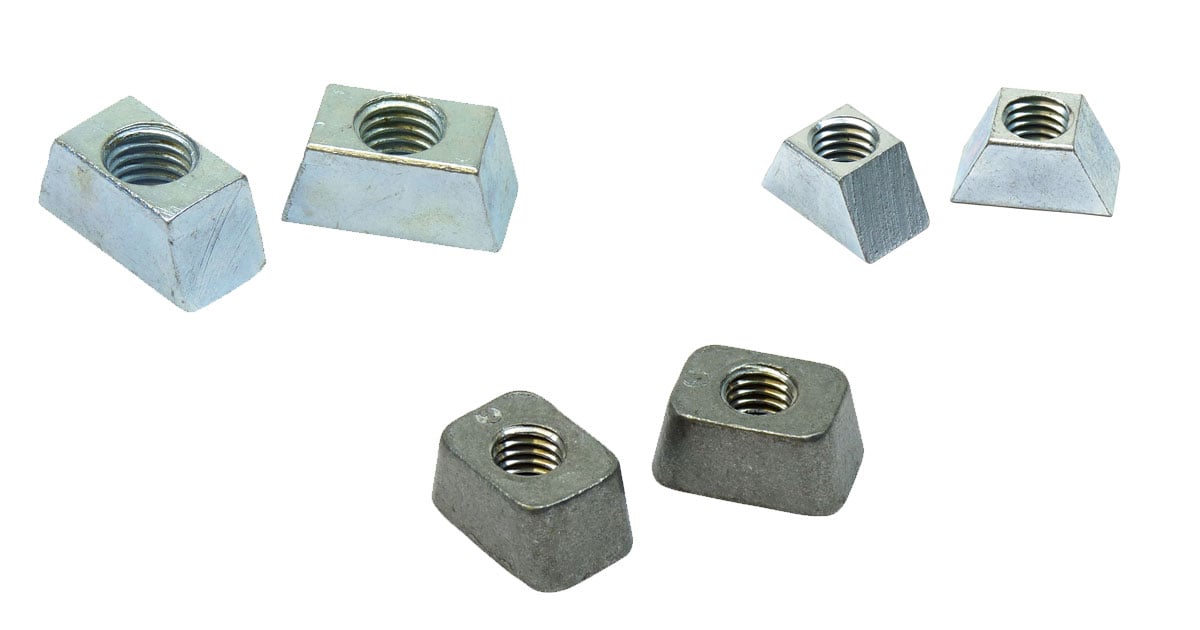
These are a very common type in M&E. These are generally used where a threaded rod suspended fixing is required. They have a tapped hole to secure threaded rod which can then be used to suspend M&E services. They fit into the V slots of several composite floor deckings, which you can see in more detail in the table below. There are three different profiles available: standard wedge nuts, mini wedge nuts, and mini-mini wedge nuts. Yes, that’s actually what they’re called!
Wedge hangers:
This other common type is a two-part fixing made up of a wedge that fixes into the decking, and a separate locking plate to secure the fixing. They’re also used in threaded rod applications. The wedge nut and locking plate are pre-assembled onto the threaded rod, inserted into the slot and rotated 90°. Tightening the nut against the locking plate locks the unit securely in the floor.
Without confusing you further, there are varieties of these that work for different deckings which we’ll talk about in more depth later. Some common names include the Lindapter Multiwedge, Alphawedge, AMD Wedge, MF wedge, TR60 wedge, and others.
Toggle clamps:
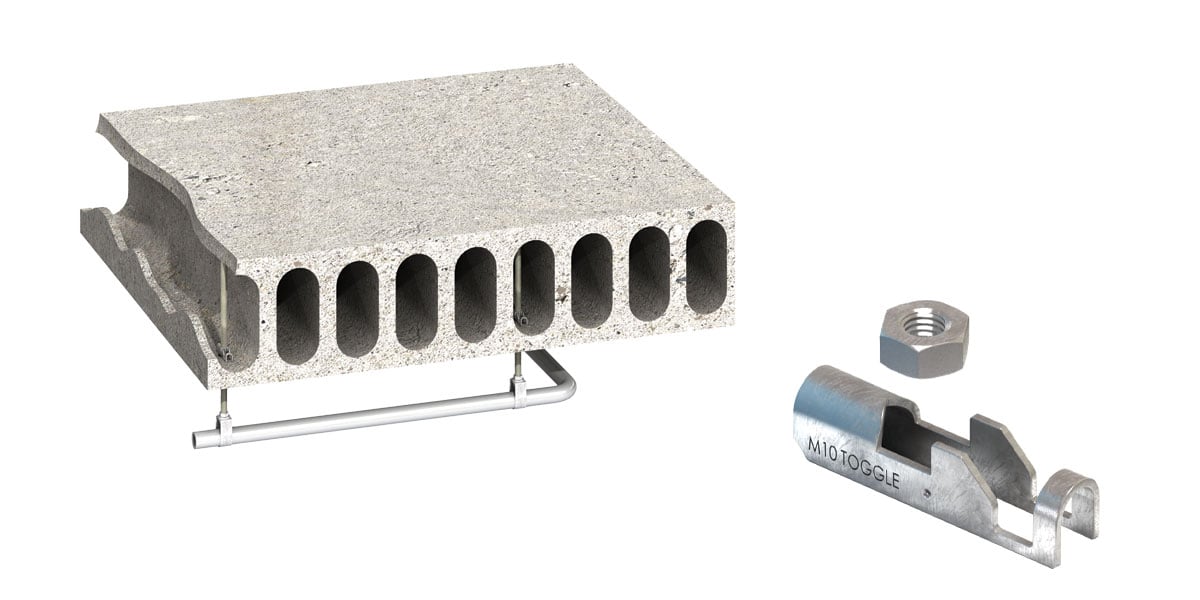
Also called Lindapter TC, these are used for service suspensions from hollow concrete floor slabs and steel decks. They’re also useful as a general-purpose heavy-duty cavity anchor as they can withstand high loads. The toggle is positioned on the end of the threaded rod and inserted into the cavity. Shaking the rod aligns the toggle horizontally across the hole. TC can be used in any cavity situation with a minimum cavity depth of 75mm.
Toggle studs (Type TD):
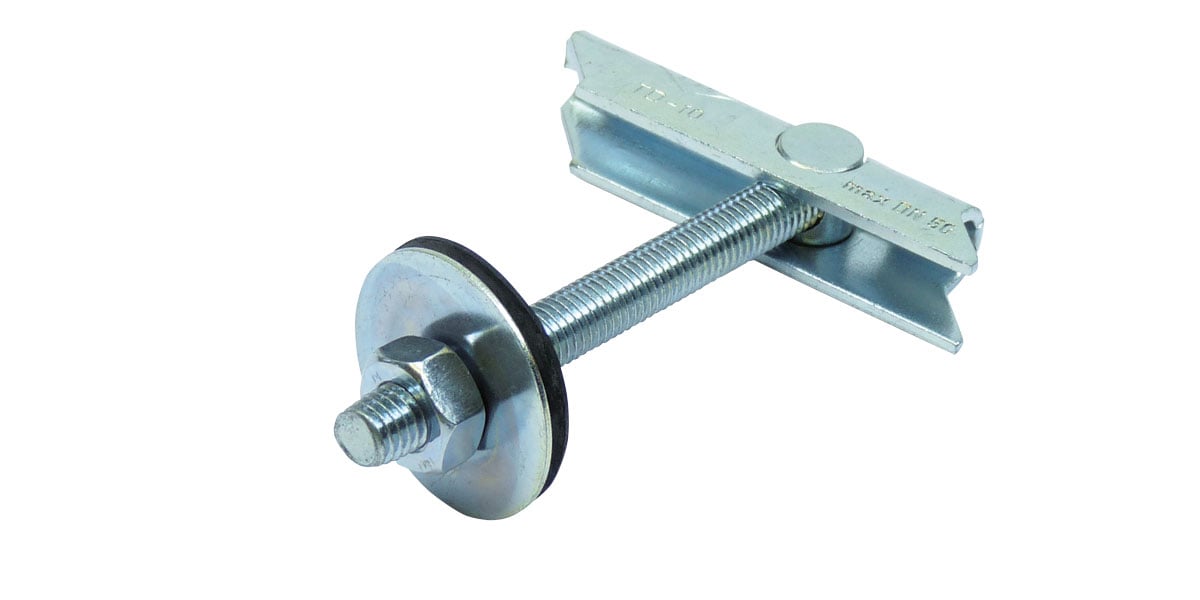
These are toggle fixings with threaded rod that are used for – can you guess? – service suspensions, again from steel decks and hollow concrete floor slabs, and are another great option as a general heavy-duty cavity anchor. They are supplied with a nut, penny washer and rubber washer and come in two lengths.
The threaded rod is secured in the toggle and can be turned for height adjustment but not completely unscrewed. TD can be used in any cavity situation with a minimum cavity depth of 85mm and have a 80kg safe load (subject to decking capacity).
Erico GTD clips:
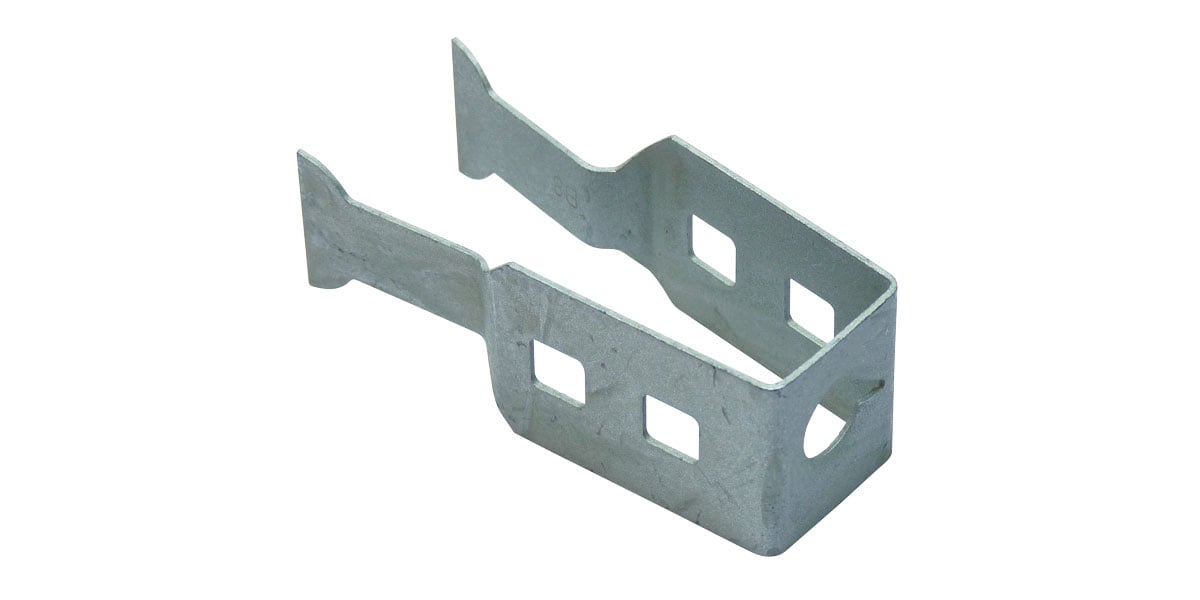
These are spring steel clips that perform the same operation as wedge nuts, but they can accommodate even greater variation in the decking slots due to their material. This can be useful on installations where the decking slots have become compressed. Threaded rod screws directly into the thread in the clip without requiring a nut. (This would be M10 thread and comes in two slot sizes).
Trapezoidal decking hanger:
As the name suggests, these are specific to trapezoidal metal sheet decks and are installed by punching holes through the decking. To fix one of these, you’ll need an M8 x 100 retaining bolt.
How do I know which decking fixing I need?
The selection process is actually a lot simpler than you might think. All you need to know to select a decking fixing is the type of decking – that’s the only factor that really matters.
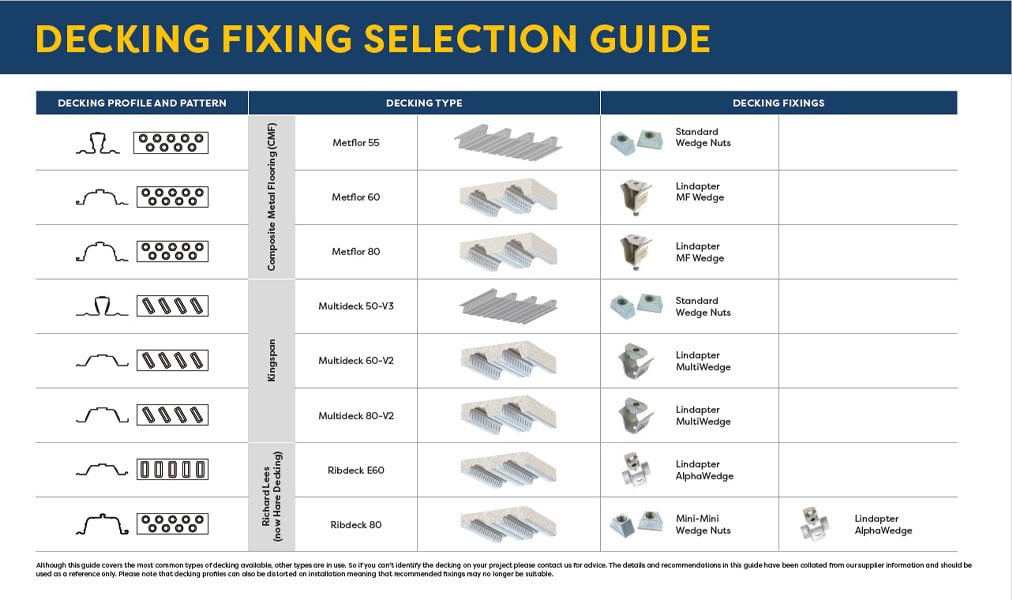
But you may be confused as to how to identify the type of decking. If so, don’t fret, it couldn’t be more straightforward. Each type of decking has a specific, unique profile and pattern which helps you identify it with no difficulty, and therefore source the correct fixing. Even if you don’t know the manufacturer, these will help you identify them easily. Next time you are working on an M&E installation, all you need to do is visually check the pattern at the side of the decking.
So, once you have identified the decking type, which fixings are suitable? Click the decking fixing selection guide below to view the full table.
Don't forget the manufacturer's recommended torque settings
The material that decking fixings (particularly wedge nuts, and the wedge part of wedge hangers) are made of is cast iron rather than steel, meaning it has been melted, poured into a mould, and allowed to solidify. Many assume that when fixing a decking fixing, the tighter you set it, the better. This is common with other types of fixings as well, such as throughbolts – tightening it until you can’t anymore! But this approach is erroneous. Because a decking fixing uses a wedge profile to secure itself, and the nut part stops it from moving, it doesn’t need to be tightened to that extent. In fact, you’re causing more damage than good by doing this - there is a possibility that the cast-iron material can be cracked if the fixing is overtightened beyond the manufacturer's recommended tightening torque. However, if installed correctly there should be no such problems as the material is proven to be durable, malleable and fit for purpose. Overall, It’s down to the incorrect installation and the tendency to tighten it until it stops which impairs the product’s integrity and causes failures. Always remember to install in accordance with the manufacturer’s recommended tightening torque.
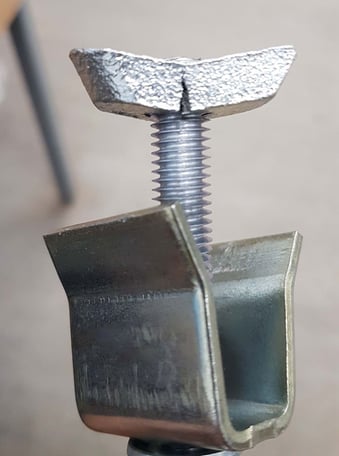
The failure shown in this image is explicitly as a result of incorrect installation and in no way is it a product failure as is often assumed.
Ensure the entrance of the wedge is within tolerance
With composite decks, the metal decking is put down first and then the concrete is poured on top. Sometimes there isn’t adequate support to stop the metal deck from flexing when the weight is placed on it. That can then lead to the profile of the wedge expanding and its entrance width adjusting, which can seriously impact the load capacity once you put a wedge in there; even making it unable to fit and be secured. In these cases, it’s common to tighten it even more to compensate – but then you end up with not one, but two problems! So, visually check the entrance to the wedge profile to ensure that it hasn’t been impacted by the weight of the concrete. A lot of it comes down to poor installation and construction of the deck. Nevertheless, it’s the M&E contractor’s responsibility to check that the integrity of the profile/deck hasn’t been compromised before fixing into it.
The question afterwards becomes, what do you do if it has been affected? This is where you might run into some trouble, which is why it’s worth thinking about ahead of time as the presented problems can significantly increase the cost of the project. There’s no easy solution, but just be aware of this and engage with a fixings and supports specialist to see how this can be overcome in the most efficient way possible. You might have to find a channel which isn’t impacted and create a suspension which spans either side of the one which has been impacted and suspend off that. Another typical attempt to solve this problem is our next point…
Don’t drill into the concrete!
Sometimes people will bypass the wedge technology of the metal deck, drill through and cut out a section from the metal underneath to expose part of the concrete, then fix straight into the concrete with a concrete fixing, like it was any other concrete ceiling. This has traditionally been regarded as an acceptable method to do it if you need to, but in reality, as soon as you need to penetrate through the metal tin, you have impacted the deck’s fire integrity. This is more common than you might think! It could be because of the above ‘deforming metal/entrance’ issue, or something as simple as inexperience with decking fixings and being used to ordinary concrete fixings – it’s ‘what you know’; understandable.
However, one of the reasons why metal plays a significant part in the combination of concrete and metal in a composite deck is because it has great fire prevention (and spreading of fire) abilities between floors. Once you penetrate the steel profile, this advantage is dissolved, and from an evidence point of view, you can’t claim that you’ve maintained its fire integrity. Just fix the decking fixings to the part that’s made for it!
Conclusion
Hopefully, you now have more extensive knowledge on the topic of decking fixings and a clearer picture of how best to deal with them, as well as common mistakes to avoid. Though this list is not exhaustive, it should help you get started with more compliant selection and installation of decking fixings.


