
.jpg?width=451&height=381&name=DSC04454%20(1).jpg)
Evidence is no longer a ‘nice-to-have’ in M&E; it’s a requirement.
Recent legislation, such as the Building Safety Act, as well as the Construction Products Competence Standard and of course, the trailblazer that pushed the movement for safety in construction, the Hackitt report, all agree with one thing: there is a need for greater evidence and accountability in construction.
To be compliant with these, you need to follow best practices and ensure all construction products and M&E bracketry sourced are backed up by evidence.
The need for evidence doesn’t necessarily come from failure or ‘doing things wrong’; but rather to be able to prove, tangibly, that you’ve done everything you can to prevent failure and to be as safe as possible!
Part of that evidence is following manufacturers’ guidelines and using the correct tools – e.g. the calibrated torque wrench.
In this article, we will be covering:
- What is a calibrated torque wrench?
- Why do you need a calibrated torque wrench to correctly install anchors (thoughbolts, concrete screws & even drop-in anchors)?
- How can a calibrated torque wrench help you to install decking fixings?
- How can a calibrated torque wrench help you to correctly install window brackets?
- Why is a calibrated torque wrench required to assemble the MX Channel System?
- How can a calibrated torque wrench help to ensure product warranties are valid.
What is a calibrated torque wrench?
Let’s get started then - a torque wrench helps to ensure your M&E supports can support the load they were designed to take. It is used to apply a specified torque to fasteners such as nuts and bolts.
So, let’s tell you more about this underestimated tool…
Why do you need a calibrated torque wrench to correctly install anchors?
When it comes to throughbolts, the only safe and recommended way to install them is by using a calibrated torque wrench.
This tool is essential for throughbolts as it not only sets the anchor but also creates the necessary clamping force to secure the fixture.
It allows the user to measure how much pressure is being applied. Using the torque wrench, the user should make sure it is set to the manufacturer’s recommended torque.
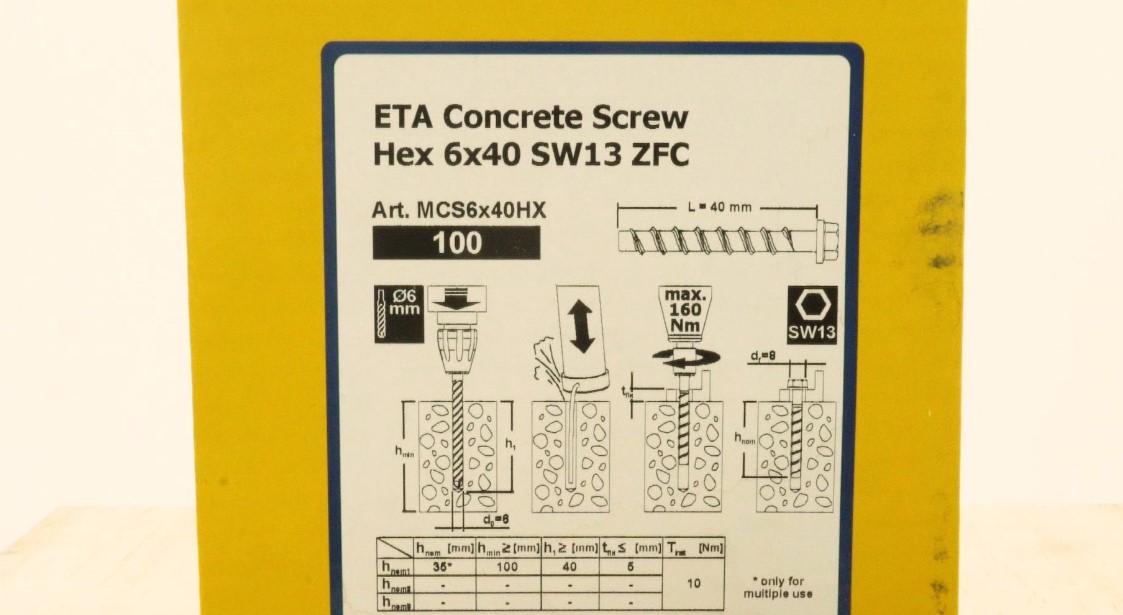
The correct torque to apply will always be on the box of ETA-approved anchors.
It’s particularly important because of a common phenomenon in throughbolts called load relaxation. This is when the stress in the bolt is dissipated into the substrate over a given period of time. It can reduce the clamping force by up to 50% with these anchors!
This is usually caused by ‘over-torquing’ the throughbolt under the assumption that ‘the tigher, the better/safer’. Unfortunately, that’s not the case – this is a common misconception. All that achieves is over-stressing and damaging the anchor, leading to either stripping of the hole, or shearing the anchor head.
Equally, though, you shouldn’t ‘under-torque’ it either because the tool may not drive the screw down until it’s shouldered on the base plate, and you’d run the risk of the fixture moving after load relaxation.
Both cases could result in anchor failure, hence the need for a torque wrench – it finds the ‘Goldilocks’ value. ⚖ If torqued to the correct value, the chances of load relaxation and/or failure are significantly reduced thanks to the clamping force.
It’s important to note that ETA-approved anchors take load relaxation into consideration – one of the reasons why you should always specify ETA anchors!
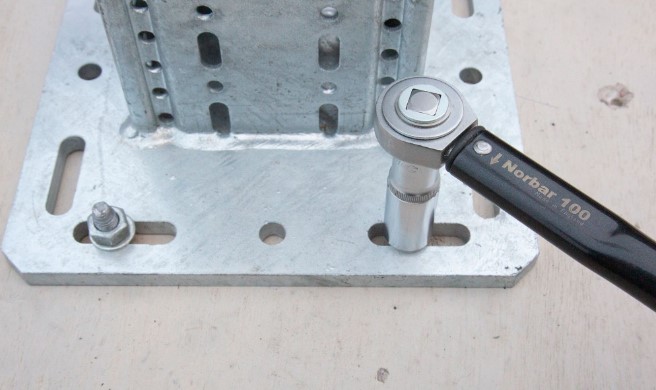
Manually installing concrete screws
You may also need a torque wrench when installing a concrete screw. When doing so, you must always use the anchor manufacturer’s recommended tool – this is usually an impact gun – that does not exceed the maximum torque (Timp. Max) as outlined in the ETA.
Typically, for the majority of substrates, it’s simply a case of driving the concrete screw into the hole so that the screw has shouldered onto the fixture and then removing your finger from the trigger.
However, for certain circumstances, you may instead need to apply the ‘installation torque’ (Tinst) using a calibrated torque wrench. This figure be found in the ETA document or printed on the box.
You’ll need this when installing concrete screws manually, and there are two scenarios where manual installation would be preferred (according to the Construction Fixings Association):
👉 When installing concrete screws in lower-strength substrates (such as green concrete or masonry)
👉 When a secondary component is attached to an already installed concrete screw
Deformation-controlled anchors (wedge anchors or drop-ins)
Finally, even the humble drop-in anchor requires a torque value to correctly lock the nut or set screw fitted to it, i.e. to create enough tension so that each connection is secure and can perform to the specified working load. Awareness of this is usually delivered through quality training.
In any case, whenever you are installing anchors, ensure you are, of course, wearing the correct PPE, and check with the manufacturer to make sure you drill a hole in the substrate to the correct diameter and depth.
Keep referring back to the BS 8539:2012+A1:2021. Code of Practice and the Building Safety Act. To be compliant with these, you need to have the correct knowledge, skills, experience, and behaviours to correctly install construction products, including anchors.

How can a calibrated torque wrench help you to correctly install decking fixings?
This may come as a surprise, but you also need a calibrated torque wrench to correctly install decking fixings.
The material that decking fixings (in particular wedge nuts, and the ‘wedge’ part of wedge hanger) are made of is cast iron and not steel. This means that it has been melted, poured into a mould, and then allowed to solidify.
Because a decking fixing uses a wedge profile to secure itself, and the nut part stops it from moving, it shouldn’t be over-tightened, as that would - once again - just cause more damage than good.
The cast-iron material could crack if the wedge nut is torqued past the manufacturer’s recommended value. Incorrect installation and over-torquing impair the product’s integrity and can cause failures.
However, when installed correctly, there should be no such problems, as the material is proven to be durable, malleable, and fit-for-purpose. This is why it’s imperative to install it correctly, in accordance with the manufacturer’s recommended torque, using a calibrated torque wrench.

How can a calibrated torque wrench help you to correctly torque cone points for window brackets?
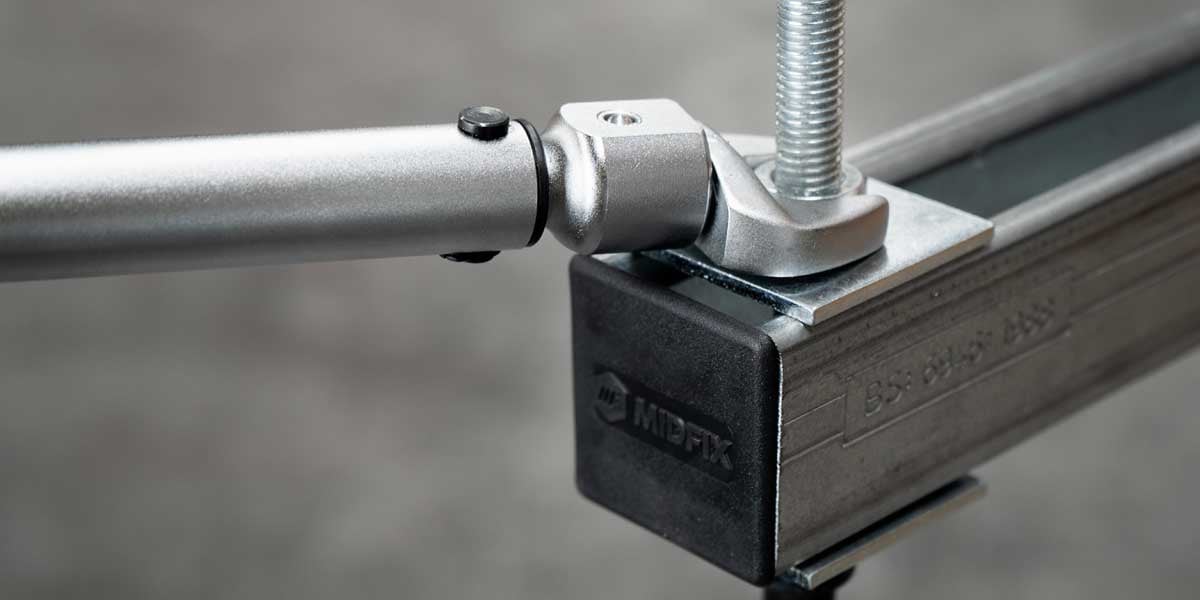
When connecting channel to steelwork, you have a few beam clamp options – but the most commonly used one is the window bracket.
What happens quite often when connecting window brackets to steel is that the installer will not have the manufacturer’s torque values to hand.
Installing the fixings anyway, despite not having the torque values, will risk damaging the window bracket if the cone point is over-tightened (which it is prone to).
Not only this but it will also stop the window bracket from being flushed agaisnt the surface of the steel. Therefore, it’s best to make sure you know the correct recommended torque value from the manufacturer and stick to it.
Torque values for window brackets are often lower than contractors expect - for example, the MX window bracket has a 10Nm torque setting for the cone point screw.
For installation best practice, follow these instructions.
🔹 Use beam clamps in pairs, with one on each side of the beam. This is essential to maintain a parallel connection between the channel and the steel flange, and therefore achieve the load rating of the connection.
🔹 The channel should extend beyond the beam clamp by a minimum of 75mm.
🔹 Position the beam clamps close to the steel flanges.
🔹 Then, tighten the bolts or nuts according to the manufacturer’s recommended torque values;
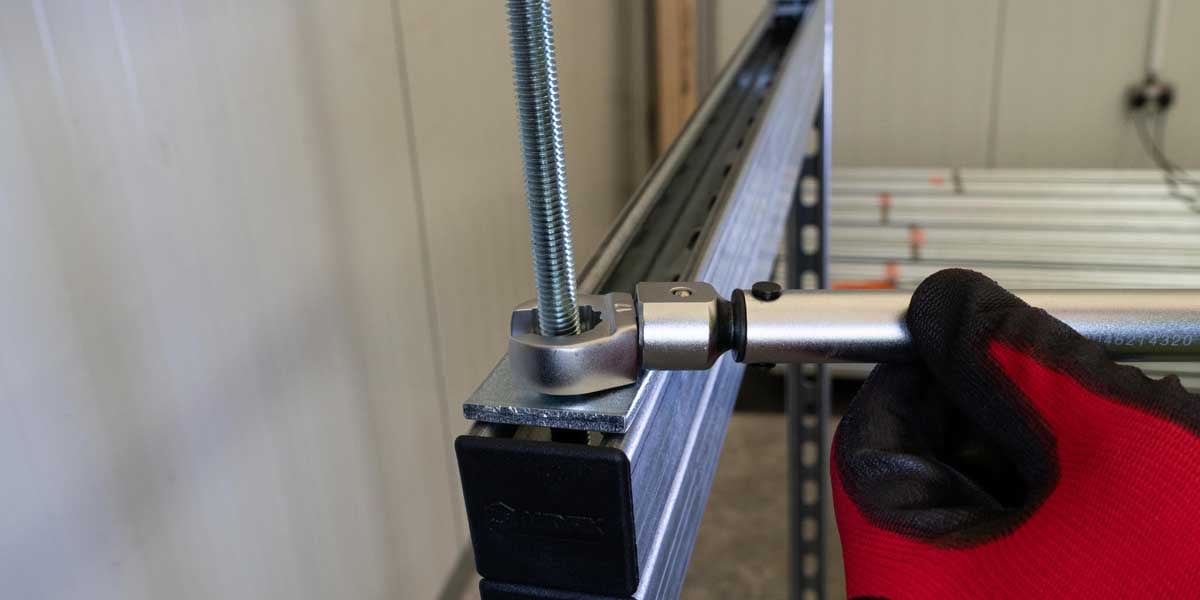
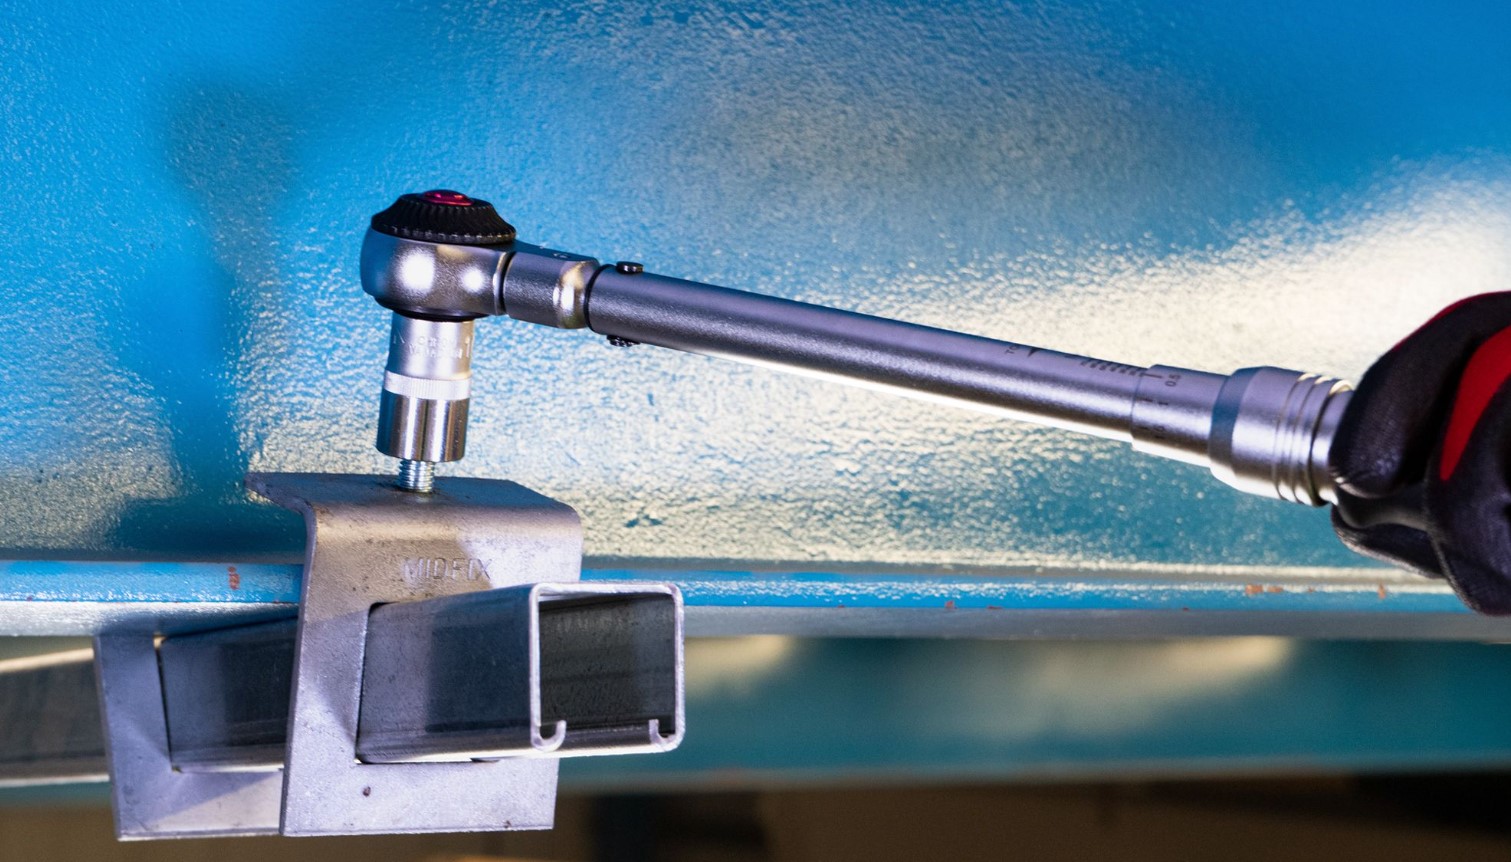
Why is a calibrated torque wrench required to correctly assemble the MX Channel System?
MIDFIX MX is a tested channel system for engineering supports. It is designed to answer the needs of the M&E sector for a quality-assured support system for building services installations, for contractors committed to following industry best practices.
A calibrated torque wrench is required to tighten the nuts and connect the channel with other components (channel accessories, e.g. channel plates, anchors, etc.). A calibrated torque wrench enables you to unlock the load data (the strength of each joint connection) making sure that the fina assembled bracket can support the load they were designed to.
To be compliant with legislation, the installer of the MX system needs to be ‘competent’ and trained. MX requires adherence to building parameters, so regardless of the installer’s experience, they will need training to correctly use the torque wrench and install the system.
How can a calibrated torque wrench help to ensure product warranties are valid.
It’s essential to keep in mind that the data and claims that manufacturers make are only valid if you follow their guidance to a T!
As an example – If you do not use the correct tools and set all the nuts and bolts to the correct torques (as per the manufacturer’s guidance) for the MX Channel System and it collapses then the product warranty wouldn't be valid.
Conclusion
Besides the obvious fact that calibrated torque wrenches are needed to provide evidence - and as mentioned earlier, evidence is now a requirement in M&E – they also come with benefits for you.
Whilst torque wrenches may initially be costly, having them in your toolbox will prove priceless! They will save you time and effort, and most importantly, mitigate risks of an unsafe installation, and therefore injury.
This, in turn, will reduce the risk of future costly rework; so you could in fact be saving money in the long run, too!
So, what do you say?
Why not make a head start and start implementing best practice today?